
How To Install Opengrok on Windows

You become a writer simply by reading and writing. “You learn best by reading a lot and writing a lot, and the most valuable lessons of all are the ones you teach yourself.”
- Stephen King
King’s quote on writing can just as well be applied to Software Development. You become a good software developer simply by reading a lot of well written code while also writing a lot of your own.
Reading code, however, is nothing like reading a book where you progress from beginning to end in one single direction. Software source code is very non-linear and code components are scattered all over. Wrapping your head around large software codebases is a near impossible feat, and if you aren’t familiar with cross referencing source code, it won’t be long before you give up in despair.
This is where Opengrok comes to your rescue. This browser based tool makes navigating source code much easier. With Opengrok, you can search for symbols, UI messages, function definitions, variable definitions and files within a codebase.
In this post I’ll walk you through the Opengrok installation process on Windows. I’ll also show how to get a sample software project up and running on Opengrok. Opengrok installation is quite a messy and convoluted process. I hope this post clearly breaks it down for you.
[Article last verified to be accurate — October 2022]
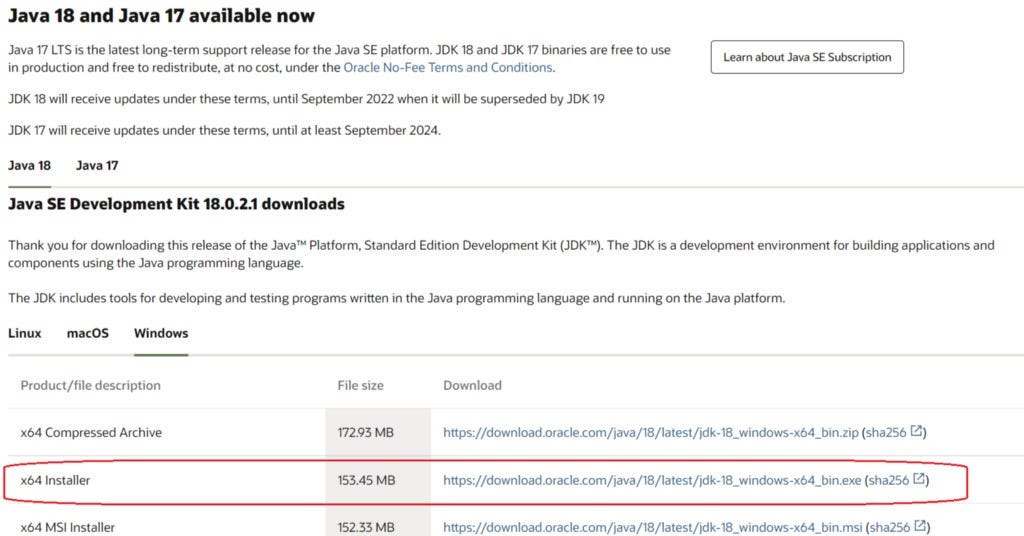
Download and install Java SE Development Kit (JDK) if you don’t already have it installed. To check if Java is setup on your machine, open up your command prompt and type in ‘java -version’. If the command spits out the version, you’re set. If not, head over to Oracle and download the latest 64-bit JDK. As of September 2022, the latest version is JDK-18.
After installation, close and reopen the command prompt and run ‘java -version’ again to verify your installation.
2. Download and install the latest 64-bit 7-zip executable.

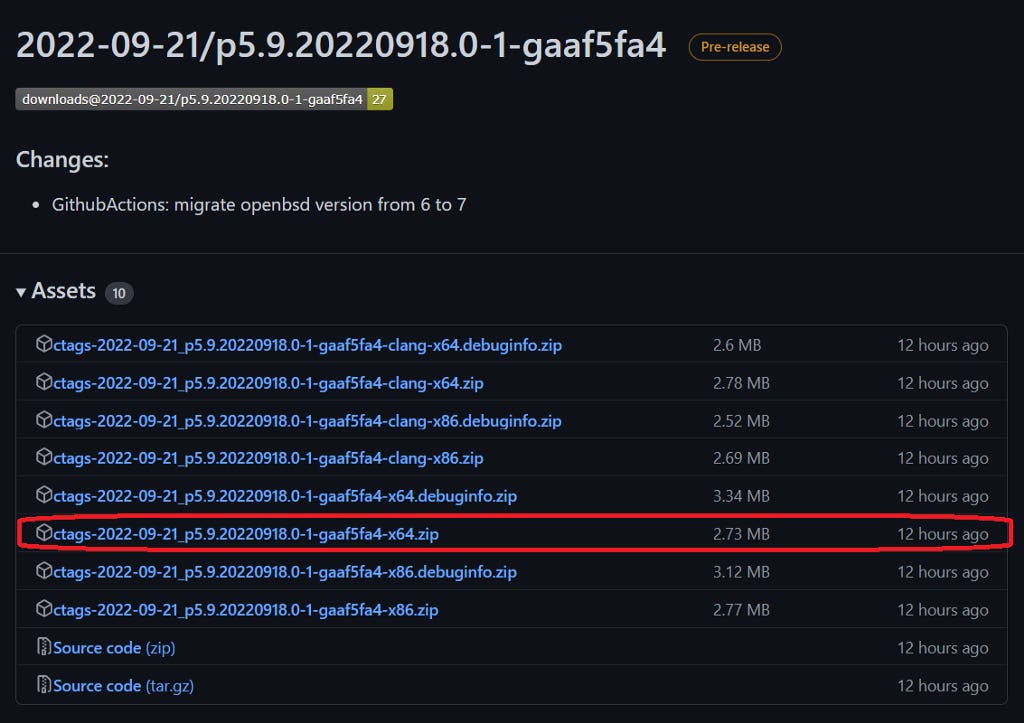
3. Download Universal Ctags x64 zip for Windows. Look under the ‘Assets’ pull-down for the binary. Just download and unzip the ctags zip archive. No installation needed here.
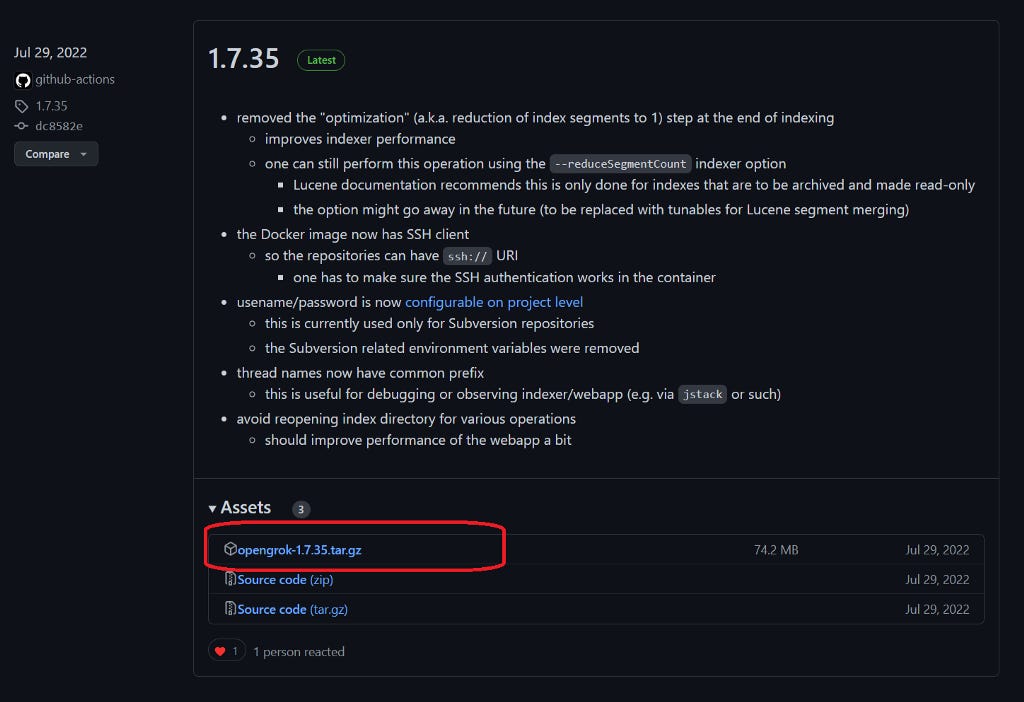
4. Go to Opengrok downloads and get the latest stable release. As of September 2022, version 1.7.35 is the latest.
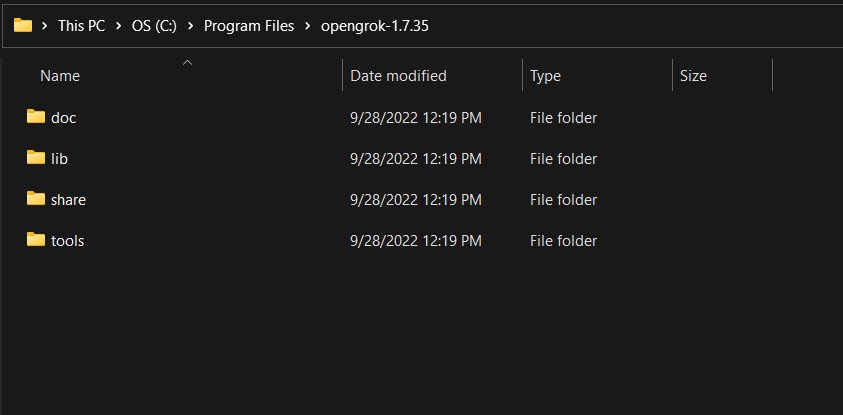
Download the tar.gz package and using an extraction software like 7zip, extract the archive. 7zip might first decompress the gz to give you the tar. You’ll then have to run 7zip again to decompress the tar. You should finally end up with an Opengrok folder with its sub-directories like so -
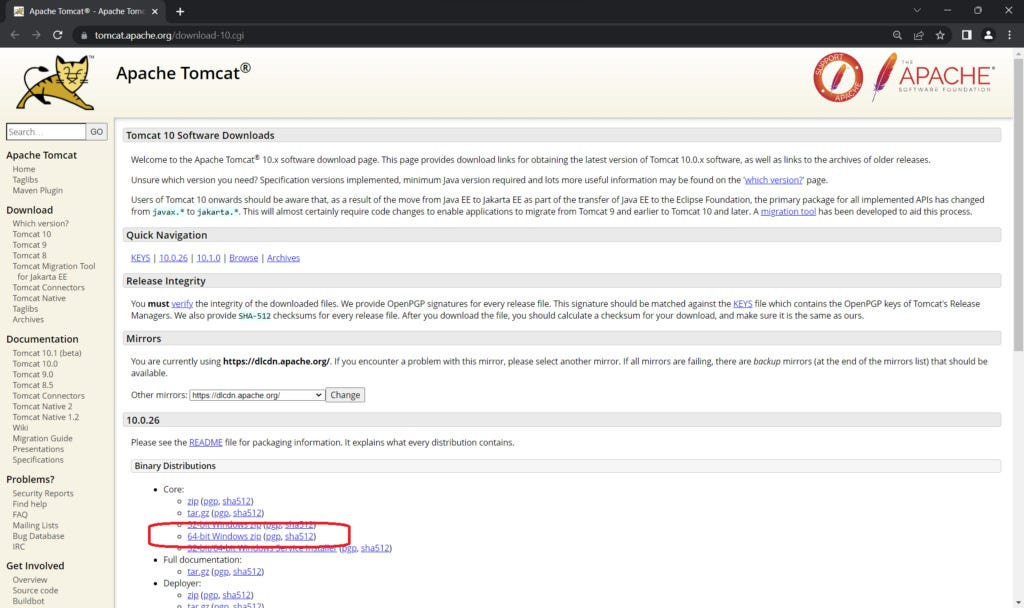
5. Download Apache Tomcat web server to host your Opengrok instance. Go to Tomcat downloads section and get the 64-bit Windows zip under Binary Distributions > Core. Once downloaded, extract the zip. No installation is needed.
6. Before launching your Tomcat web server, you need to set up two environment variables — CATALINA_HOME and JAVA_HOME. Hit the window button and type “Environment variables” to pull up the window. Now under the system variables section, press New and add the two new variables. CATALINA_HOME should point to the Apache Tomcat directory and JAVA_HOME should point to your JDK directory. You can also make these new entries under User variables instead of System variables.

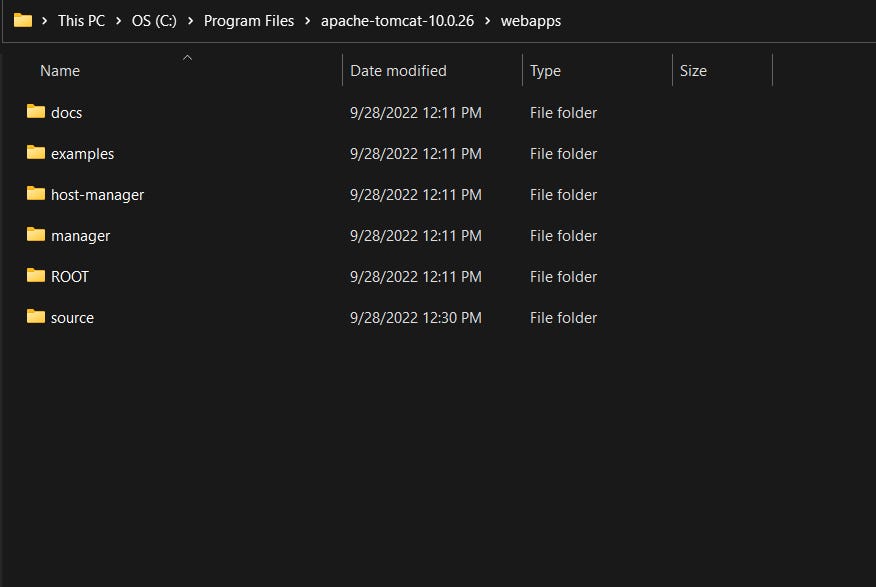
7. Go to Opengrok > lib and extract source.war archive into a folder named source. You can use 7zip to extract the war archive. After this extraction, copy the entire ‘source’ folder into the apache > webapps folder.
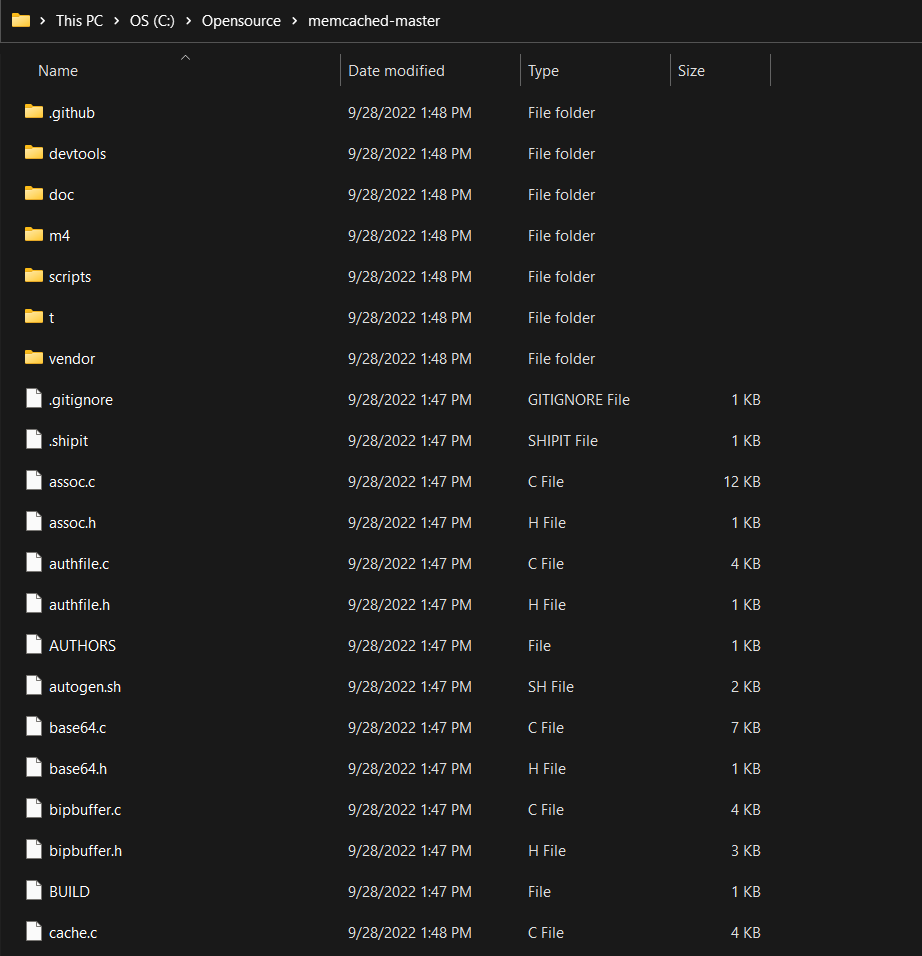
8. We’re now nearly finished with setting up Opengrok. We can now proceed to download some source code and load it up on Opengrok. I’ll use the open source project ‘Memcached’ as an example. Head on over to the project’s Github and pull the source code, or get the zip here and extract the code into a folder — say for example — C:\Opensource.
9. Open up your command prompt and navigate to your Opengrok directory. Type in the below command:
java -jar lib\opengrok.jar -W .\configuration.xml -c <path to ctags>\ctags.exe -P -S -v -s C:\OpenSource -d .\grokdata

This will kick off indexing for all items under the directory you specified in the above command. In the example screenshot above, every eligible item under C:\Opensource will be indexed. You will end up with a configuration.xml file newly created under the Opengrok folder after indexing completes.
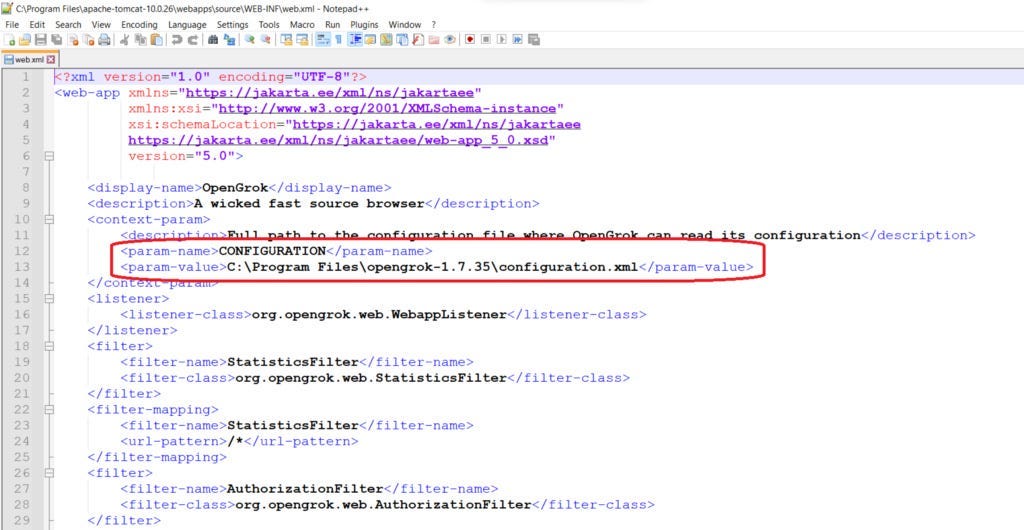
10. Go to apache > webapps > source > WEB-INF > web.xml and edit the “CONFIGURATION” tag. Point it to the generated opengrok > configuration.xml file. I use notepad++ to edit these XMLs.
11. Launch Tomcat server by navigating to apache > bin and double clicking on startup.bat. If everything is set up correctly, you can expect to see a Tomcat startup window that looks like the one below. Don’t be discouraged by the exceptions and errors you might see like in the screenshot below. Leave the window running.

Now in your browser, type in http://localhost:8080 to verify that your Tomcat server is running. You should expect to see this below page.
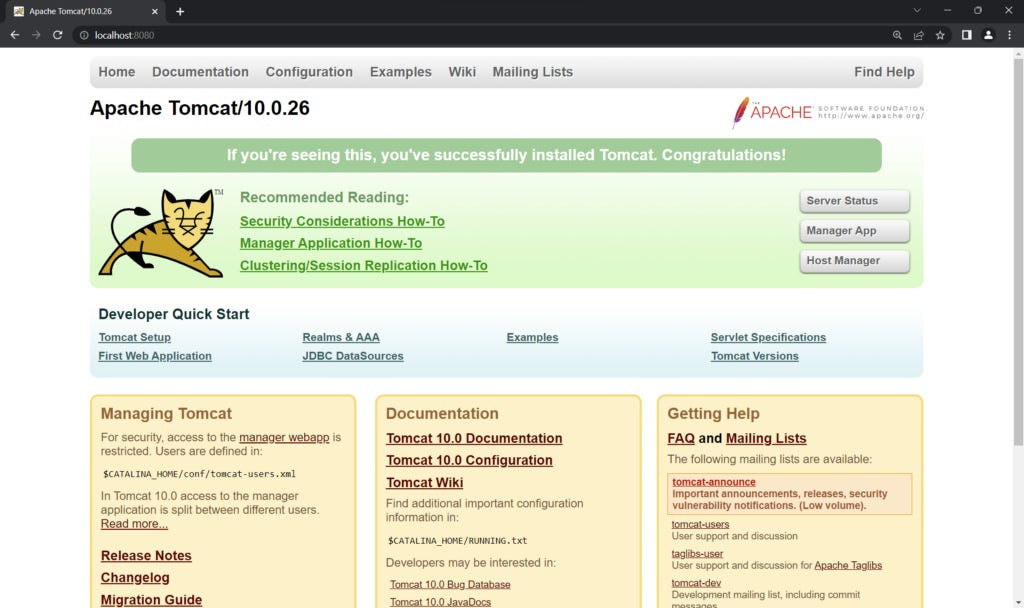
Like the page says, congratulations for having come this far!
12. As a final step, to get to your source code hosted on Opengrok, go to localhost:8080/source.
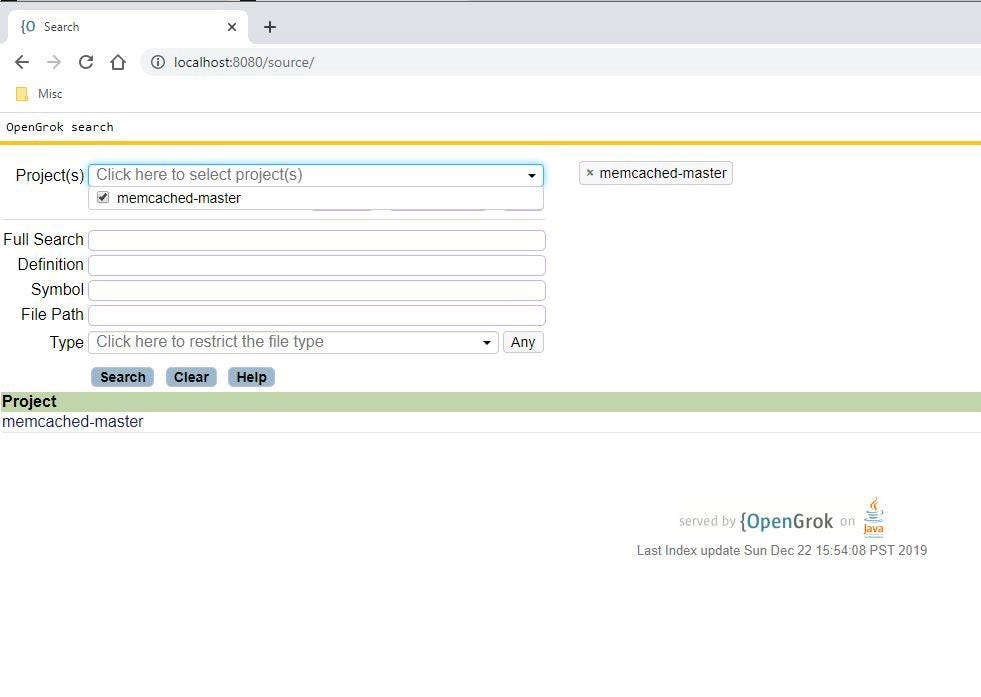
Mission accomplished!
A side note here: Recently I ran into the below issue on opening localhost:8080/source.

To fix this issue, open up apache > webapps > source > index.jsp file in a text editor. Scroll down to the very bottom and change “foot.jspf” to “/foot.jspf” and save the file. Now revisit localhost:8080/source and things should work.

With Opengrok successfully installed, you can now download the source code of projects that interest you and simply run the indexer on the root folder that houses all your projects. The indexer sometimes takes a while to finish up on large code bases. If you modify the source code and would like to see the changes up on Opengrok, run the indexer again and reload the web page. Subsequent indexing should be fairly quick.
To shutdown Tomcat server, simply close the window that opened up when you ran apache\bin\startup.bat. To ensure that Tomcat shuts down cleanly, you can also run apache\bin\shutdown.bat as an additional step.
If you like to keep your system lean like I do, you can now uninstall 7zip if you wish.
> Happy grokking :)